
Istio Kubernetes 구축 및 Nginx 테스트
Istio Kubernetes 구축 및 Nginx 테스트

Istio 란?
오픈소스 service mesh로 microservice를 보호, 연결, 모니터링할 수 있습니다.
여기서 service mesh란 microservice의 네트워크와 트래픽을 관리할 수 있습니다.
각 service 간에 직접 호출하는 것이 아닌 sidecar 형태의 proxy를 넣어 인입되거나 나가는 트래픽을 네트워크 단에서
통제가 가능하며, 복잡해진 네트워크를 제어할 수 있게 도와줍니다.
Istio 기능
- Load balancing: HTTP, TCP, WebSocket 트래픽에 대한 허용 및 로드 밸런싱
- Fine-grain control: 각 트래픽에 대한 라우팅 규칙, 재시도, 장애복구와 같은 제어 기능
- Access control: 정책 확인 및 액세스 제어 가능
- Visibility: 로그나 그래프를 활용 가능
Istio 컴포넌트
- Pilot: 실제 Istio의
service mesh를 자동으로 구축하며, Istio의 핵심 컴포넌트이며Envoy에 대한 설정 관리를 합니다.- Service discovery
- Traffic routing control
- Citadel: 보안 측면과 CA를 내장하고 있어 사용자 인증(Authentication), 인가(Authorization) 및 TLS 암호화와 인증서를 관리하는 역할을 수행합니다.
- Mixer: 중앙 집중 관리되는 컴포넌트로, Access control, 정책 통제, 각종 모니터링의 지표를 수집합니다.
- Galley: Istio의 설정에 대한 유효성 검사를 합니다.
Istio Kubernetes Installation
설치 방법은 다음과 같습니다.
- istioctl : 본 글에서 설치할 방법입니다.
- helm: helm을 활용해 설치하는 방법입니다.
- istio operator : Opeartor를 활용해 설치하는 방법
Istioctl
Istio 설치를 위해 istioctl을 다운받습니다.
cd /opt
curl -L <https://istio.io/downloadIstio> | sh -

# PATH를 등록합니다.
vi ~/.bashrc
---
export PATH=/opt/istio-1.22.3/bin:$PATH
명령어를 확인해봅니다.
istioctlIstio core와 istiod 및 istio ingressgateway 설치를 진행합니다.
Istio 공식문서의 config-profiles 내용을 확인해봅니다.
https://istio.io/latest/docs/setup/additional-setup/config-profiles/
본 글에서는 default로 설치를 진행하겠습니다.
istioctl install --set profile=default -y --set meshConfig.enableTracing=true
Istio가 설치되는 default namespace인 istio-system을 확인해봅니다.
kubectl get all -n istio-system
---
NAME                                        READY   STATUS    RESTARTS   AGE
pod/istio-ingressgateway-68fdd9689f-nrh9j   1/1     Running   0          39s
pod/istiod-68659fc5b5-znl49                 1/1     Running   0          53s

NAME                           TYPE           CLUSTER-IP    EXTERNAL-IP   PORT(S)                                      AGE
service/istio-ingressgateway   LoadBalancer   10.105.2.1    <pending>     15021:30993/TCP,80:30757/TCP,443:32529/TCP   39s
service/istiod                 ClusterIP      10.110.7.24   <none>        15010/TCP,15012/TCP,443/TCP,15014/TCP        53s

NAME                                   READY   UP-TO-DATE   AVAILABLE   AGE
deployment.apps/istio-ingressgateway   1/1     1            1           39s
deployment.apps/istiod                 1/1     1            1           53s

NAME                                              DESIRED   CURRENT   READY   AGE
replicaset.apps/istio-ingressgateway-68fdd9689f   1         1         1       39s
replicaset.apps/istiod-68659fc5b5                 1         1         1       53s

NAME                                                       REFERENCE                         TARGETS         MINPODS   MAXPODS   REPLICAS   AGE
horizontalpodautoscaler.autoscaling/istio-ingressgateway   Deployment/istio-ingressgateway   <unknown>/80%   1         5         1          39s
horizontalpodautoscaler.autoscaling/istiod                 Deployment/istiod                 <unknown>/80%   1         5         1          53s
Istio 활용하여 Gateway 및 VirtualService 생성
Istio는 Gateway 와 Virtual Service 를 통해 인입되는 트래픽을 전달합니다.
Namespace
Nginx Test를 위한 새로운 namespace를 생성합니다.
kubectl create namespace nginx-testIstio Sidecar injection은 다음으로 설정합니다.
kubectl label namespace [NAMESPACE] istio-injection=enabled

kubectl label namespace nginx-test istio-injection=enabled
Describe로 Label을 확인해봅니다.
kubectl describe namespace nginx-test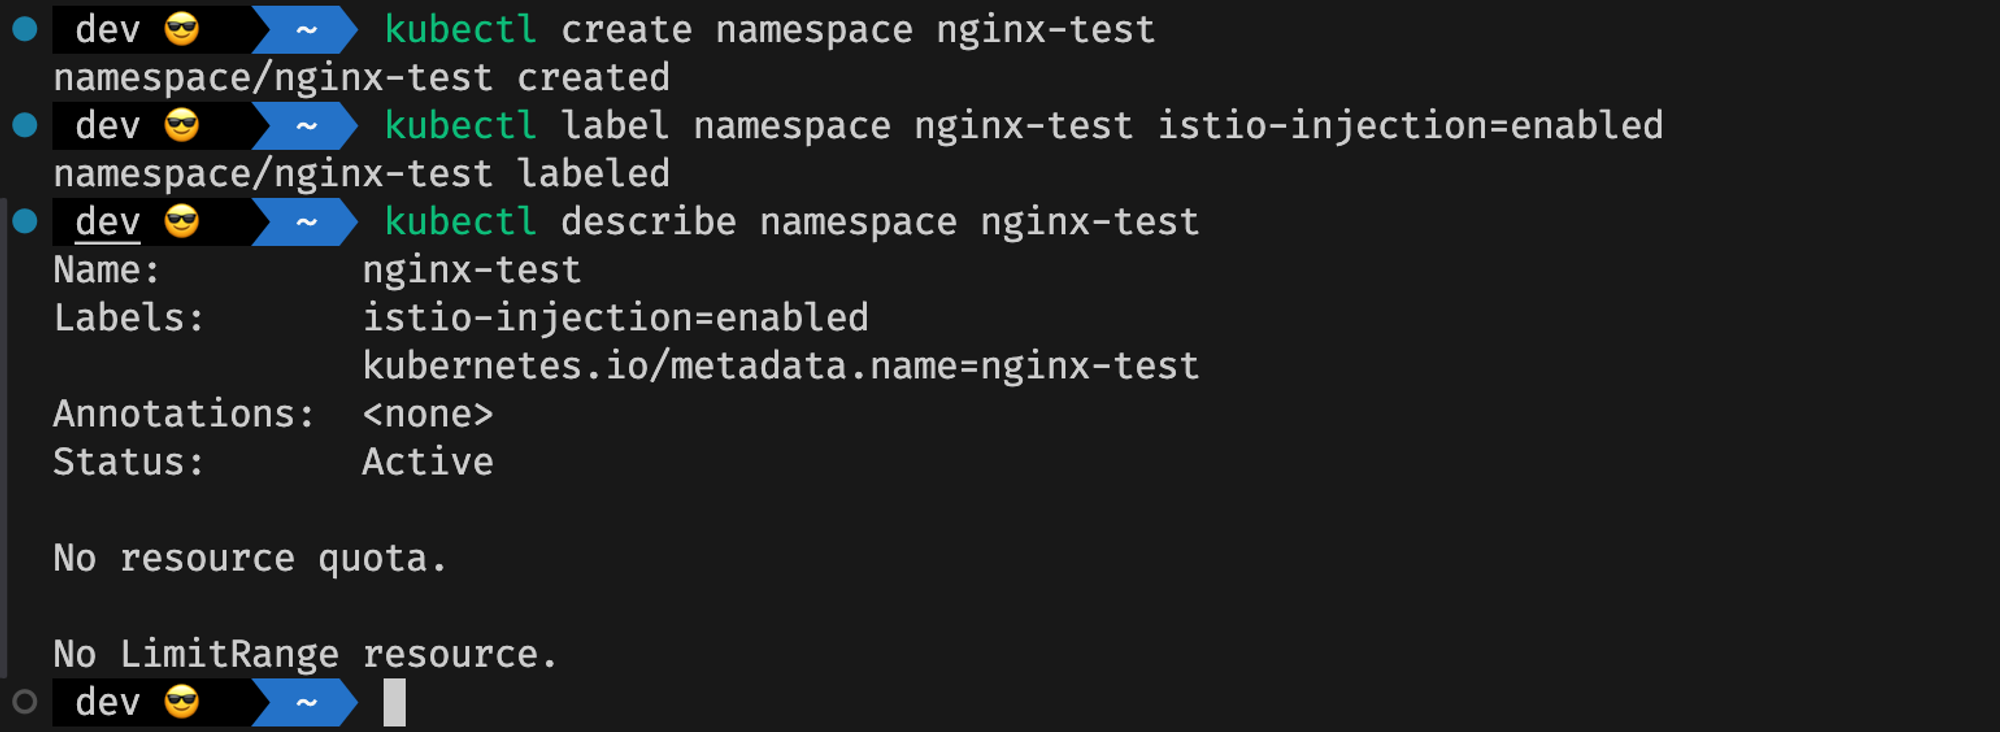
Gateway
다음은 Gateway를 생성해보겠습니다.
- selector.istio: ingressgateway 지정 필요합니다.
- spec.servers.port: 포트와 프로토콜 지정합니다.
- spec.servers.hosts: ‘’ → Query 기준으로 트래픽을 라우팅할 수 있음, 도메인 네임 작성, 특정 도메인만 허용할 것인지 ‘’로 모든 도메인을 허용할 것인지 작성합니다.
apiVersion: networking.istio.io/v1alpha3
kind: Gateway
metadata:
  name: http-gateway
  namespace: nginx-test
spec:
  selector:
    istio: ingressgateway
  servers:
  - port:
      number: 80
      name: http
      protocol: HTTP
    hosts:
    - '*'
위의 Gateway 를 생성해보겠습니다.
kubectl create -f gateway.yaml

kubectl get gateway -nnginx-test

kubectl describe gateway -nnginx-test http-gateway
----
Name:         http-gateway
Namespace:    nginx-test
Labels:       <none>
Annotations:  <none>
API Version:  networking.istio.io/v1
Kind:         Gateway
Metadata:
  Creation Timestamp:  2024-08-04T15:39:44Z
  Generation:          1
  Resource Version:    5747850
  UID:                 8071053c-13f8-409b-bee1-1ab0368c9f9f
Spec:
  Selector:
    Istio:  ingressgateway
  Servers:
    Hosts:
      *
    Port:
      Name:      http
      Number:    80
      Protocol:  HTTP
Events:          <none>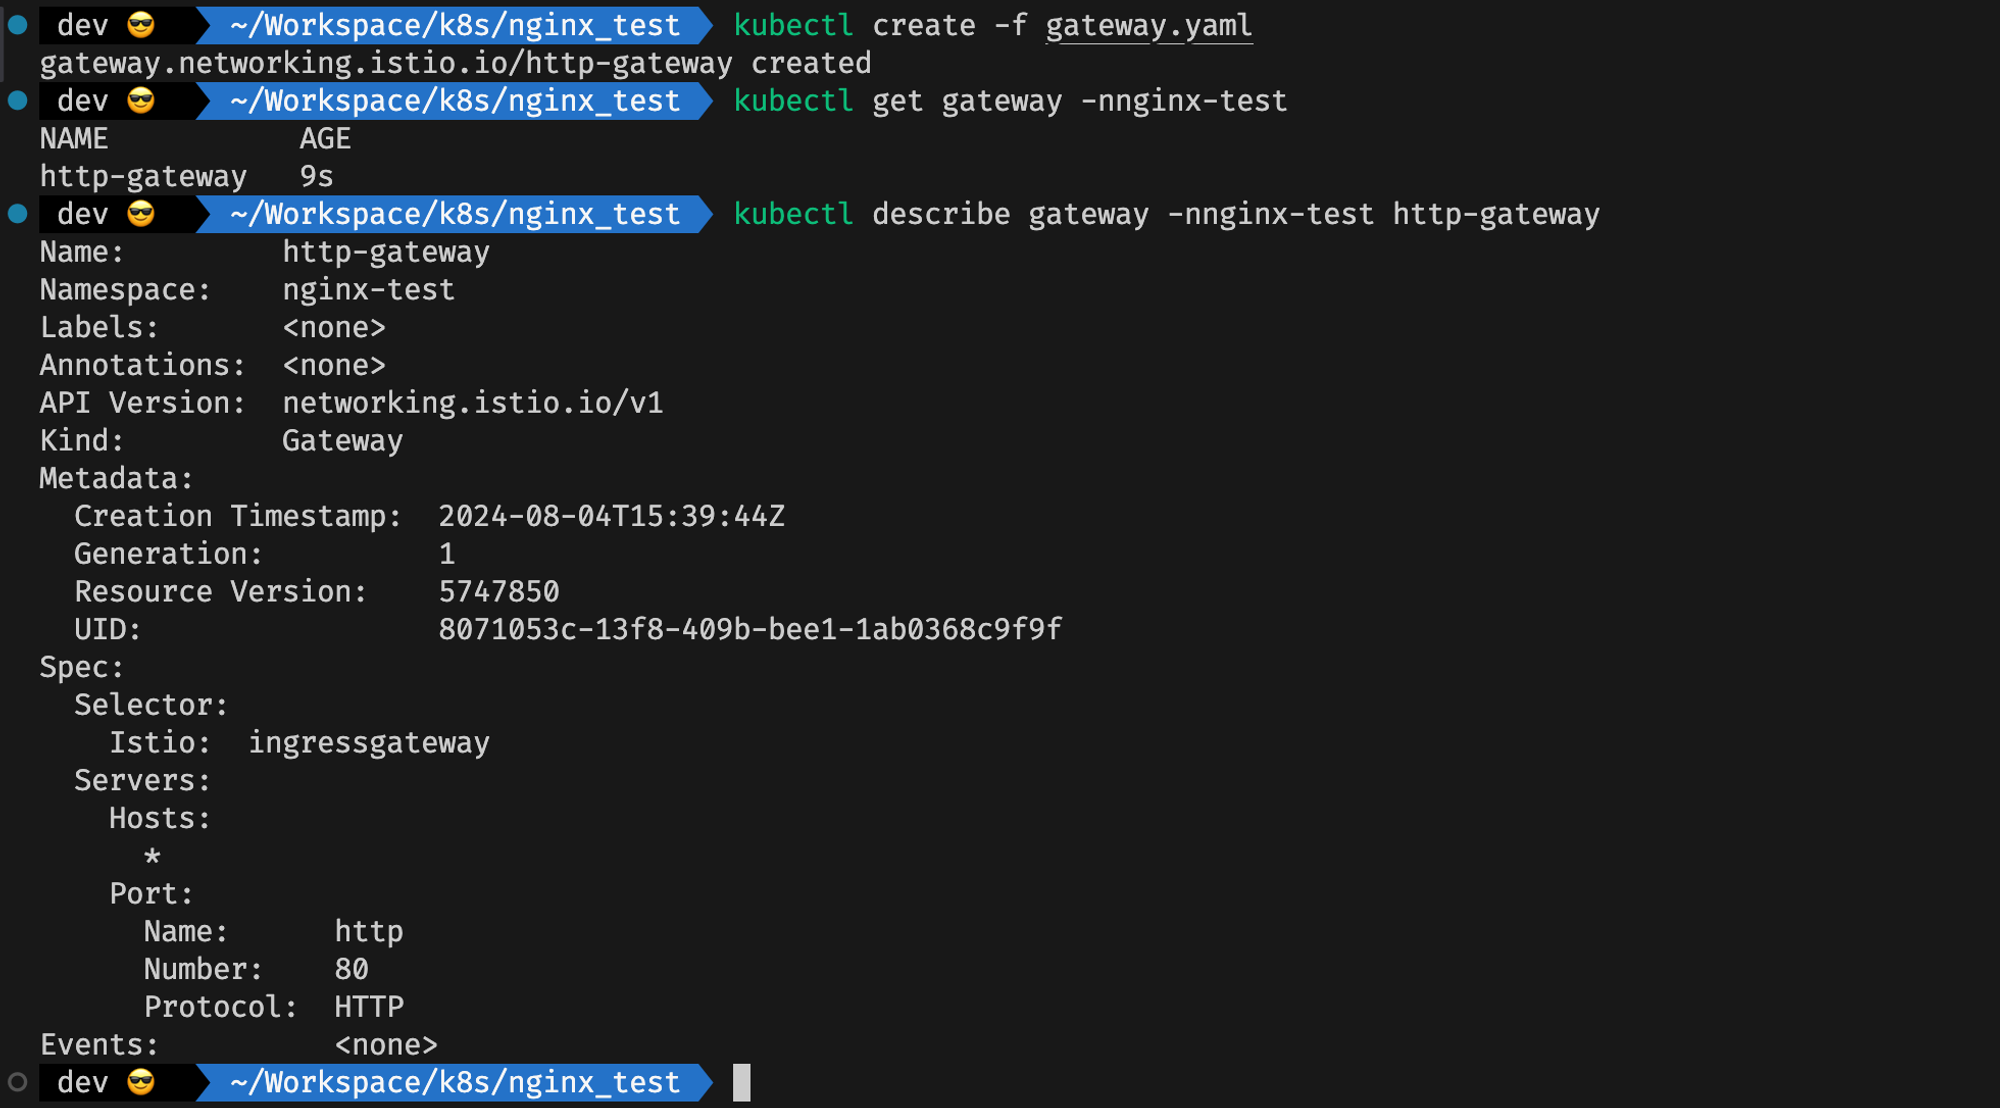
Nginx
Nginx를 생성하기 위해 다음의 deployment를 입력합니다.
apiVersion: apps/v1
kind: Deployment
metadata:
  labels:
    app: nginx-test
  name: nginx-test
  namespace: nginx-test
spec:
  replicas: 1
  selector:
    matchLabels:
      app: nginx-test
  template:
    metadata:
      name: nginx-test
      labels:
        app: nginx-test
    spec:
      containers:
        - name: nginx-test
          image: nginx:1.23.3
          ports:
            - containerPort: 80
위의 Deployment를 생성해봅시다.
kubectl create -f deployment.yaml

kubectl get pod -nnginx-test
---
NAME                          READY   STATUS            RESTARTS   AGE
nginx-test-7cb5b868d4-bj64t   0/2     PodInitializing   0          6s

kubectl describe pod -nnginx-test nginx-test-7cb5b868d4-bj64t
---
Containers:
  nginx-test:
    Container ID:   docker://603fee778d686e3e726ffff3de820654cdc935c641216bc5dc2b01f6a4da9765
    Image:          nginx:1.23.3
    Image ID:       docker-pullable://nginx@sha256:f4e3b6489888647ce1834b601c6c06b9f8c03dee6e097e13ed3e28c01ea3ac8c
    Port:           80/TCP
    Host Port:      0/TCP
    State:          Running
      Started:      Mon, 05 Aug 2024 00:26:38 +0900
    Ready:          True
    Restart Count:  0
    Environment:    <none>
    Mounts:
      /var/run/secrets/kubernetes.io/serviceaccount from kube-api-access-7pmnb (ro)
  istio-proxy:
    Container ID:  docker://650abc7065be62e4170d00095c2a8c0fa28ad0e4e6fb060cc97e732a6602385b
    Image:         docker.io/istio/proxyv2:1.22.3
    Image ID:      docker-pullable://istio/proxyv2@sha256:36b52aff95b8bbf0a8e65941abb23d4b01fd58678a29adce7a8cd2eb019e937f
    Port:          15090/TCP
    Host Port:     0/TCP
    Args:
      proxy
      sidecar
      --domain
      $(POD_NAMESPACE).svc.cluster.local
      --proxyLogLevel=warning
      --proxyComponentLogLevel=misc:error
      --log_output_level=default:info
Nginx의 Container 뿐만 아니라 Istio의 Proxy container도 함께 생성됩니다.
Service
Nginx의 Service를 생성하여 서비스 포트를 노출시킵니다.
apiVersion: v1
kind: Service
metadata:
  labels:
    app: nginx-test
  name: svc-nginx-test
  namespace: nginx-test
spec:
  ports:
  - name: http
    port: 80
    protocol: TCP
    targetPort: http
  selector:
    app: nginx-test
  type: ClusterIP
위의 Service를 생성합니다.
kubectl create -f service.yaml

kubectl get service -nnginx-test

kubectl describe service -nnginx-test svc-nginx-test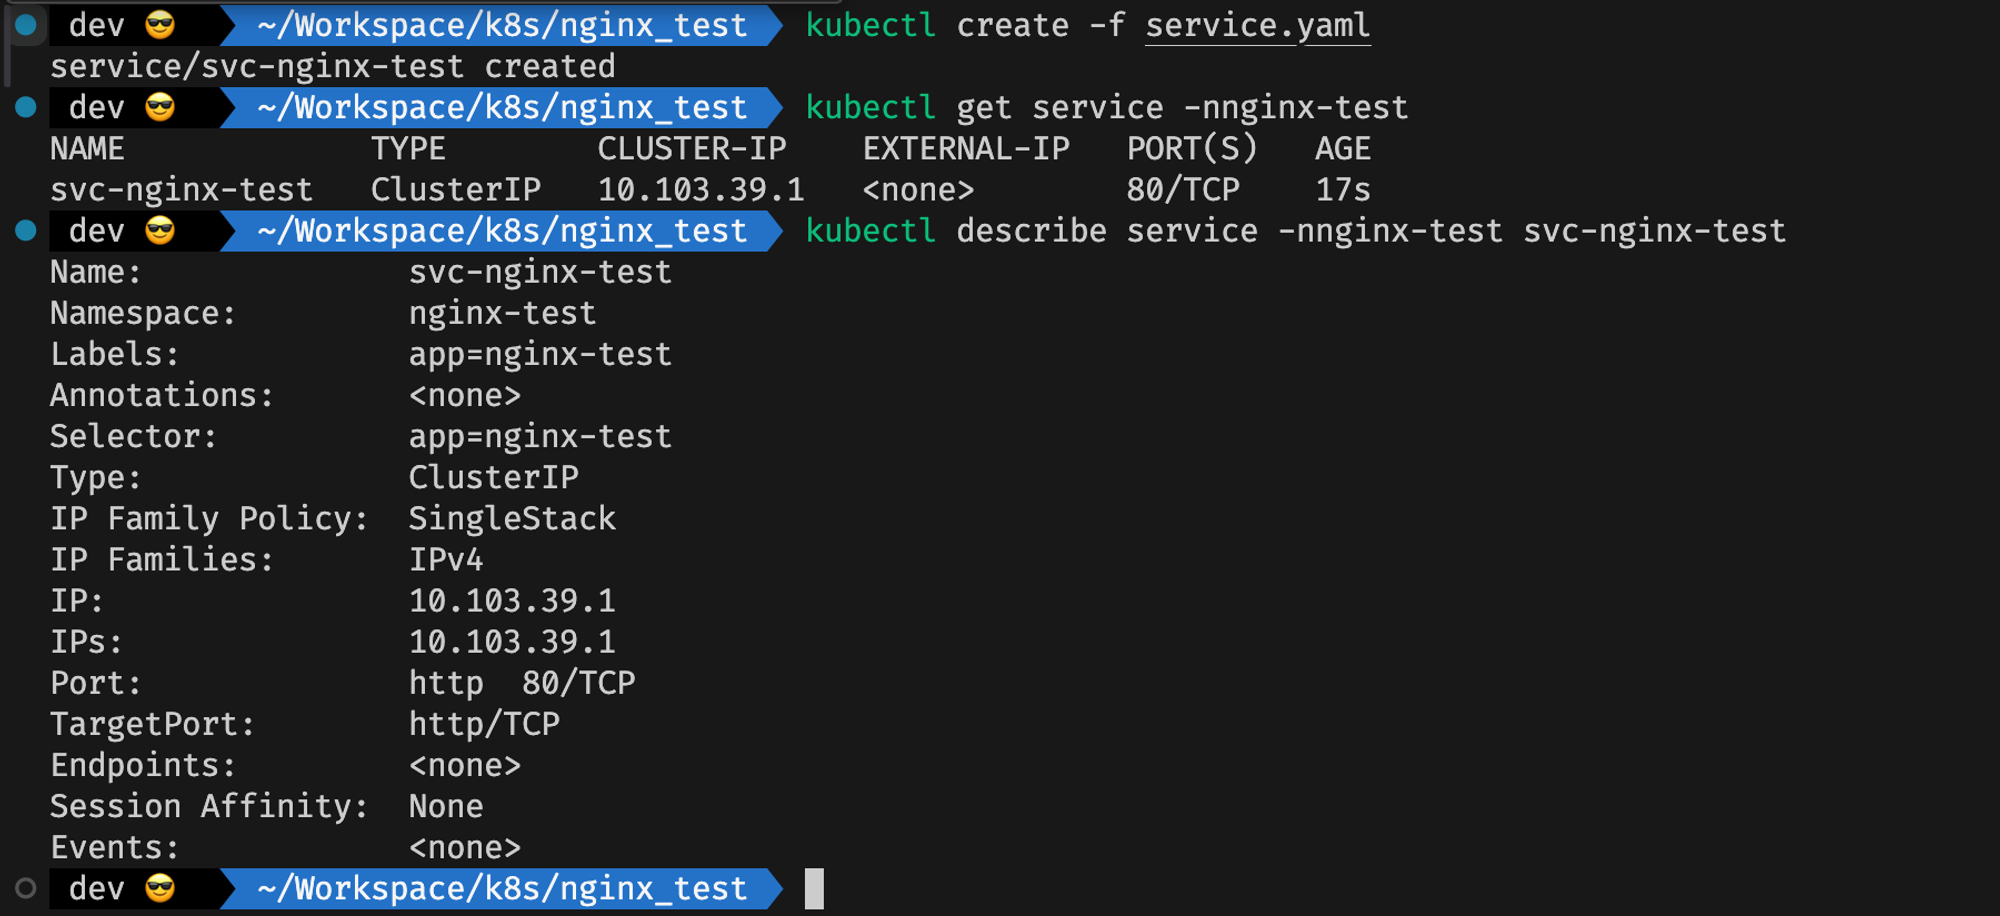
Virtual Service
다음은 Virtual Service를 생성해보겠습니다.
Routing Configuration을 설정합니다.
- spec.hosts → 처리할 트래픽 Query 등록합니다.
- L4(Port), L7(도메인) 기반 처리 가능합니다.
- http.route.destination
- host: Service 이름
- port.number: 해당 포트
apiVersion: networking.istio.io/v1alpha3
kind: VirtualService
metadata:
  name: virtualservice
  namespace: nginx-test
spec:
  gateways:
  - http-gateway
  hosts:
  - '*'
  http:
  - route:
    - destination:
        host: svc-nginx-test.nginx-test.svc.cluster.local
        port:
          number: 80
위의 VirtualService를 생성해보겠습니다.
kubectl create -f virtualservice.yaml

kubectl get virtualservice -nnginx-test

kubectl describe virtualservice -nnginx-test virtualservice
---
Name:         virtualservice
Namespace:    nginx-test
Labels:       <none>
Annotations:  <none>
API Version:  networking.istio.io/v1
Kind:         VirtualService
Metadata:
  Creation Timestamp:  2024-08-04T15:41:34Z
  Generation:          1
  Resource Version:    5748178
  UID:                 759b17bf-39d0-4d9f-b29a-382b7fbcbddc
Spec:
  Gateways:
    http-gateway
  Hosts:
    *
  Http:
    Route:
      Destination:
        Host:  svc-nginx-test.nginx-test.svc.cluster.local
        Port:
          Number:  80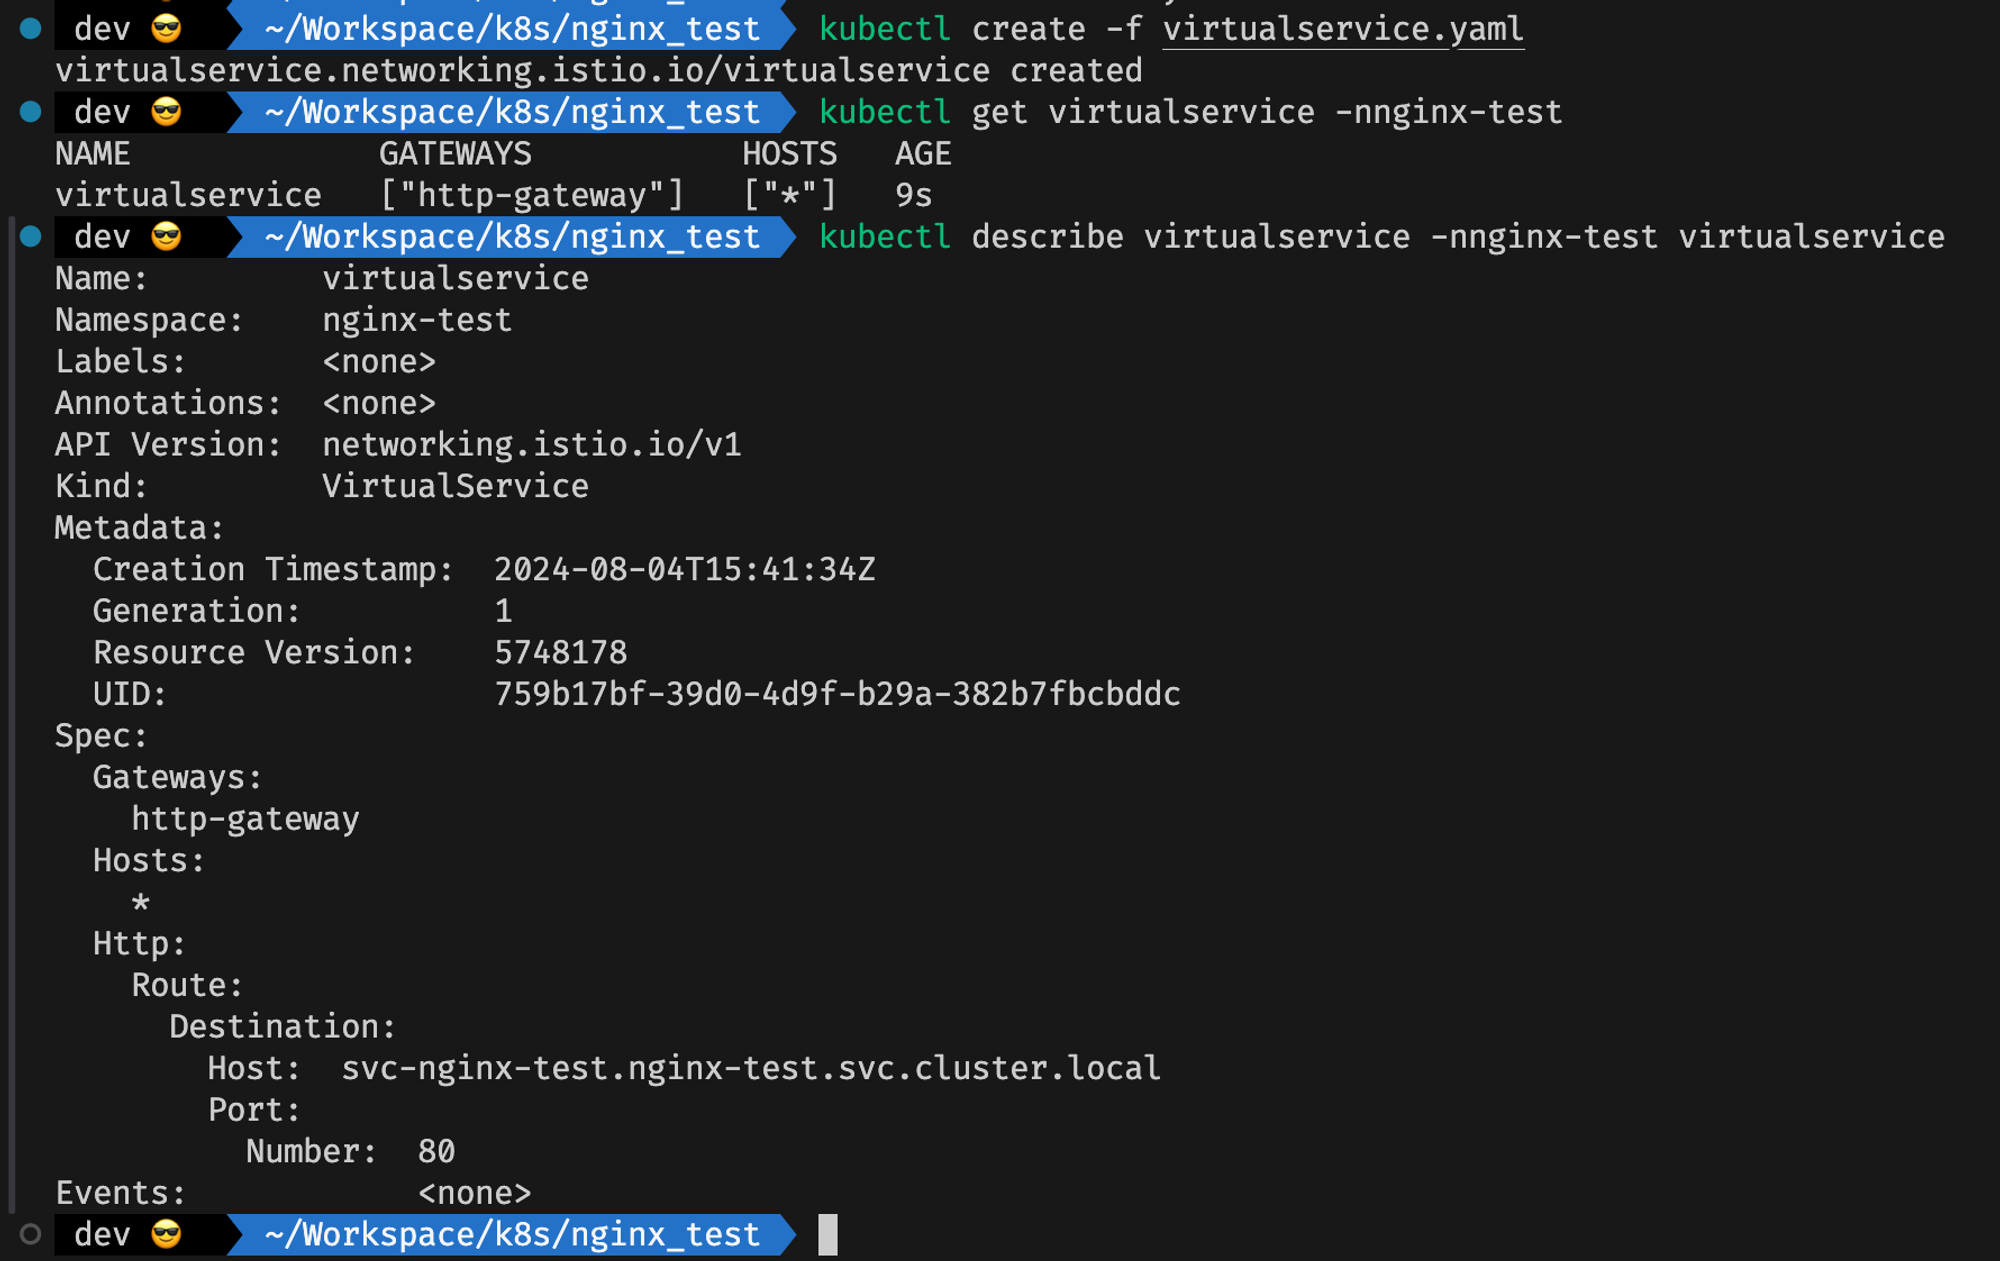
Ingress Gateway
- 외부 Client가 요청을 보낼 경우 Node port로 요청을 해야되며 내부적으로는 80, 443, 50051로 변환합니다.
- istio-ingress gateway는 기본적으로 deny all traffic으로, Gateway라는 Object를 통해 외부 트래픽을 받을 수 있도록 허용해야 합니다.
돌아와서 istio-system 의 Ingress Gateway의 포트를 확인해보겠습니다.
 kubectl get svc -nistio-system
 ---
 NAME                   TYPE           CLUSTER-IP    EXTERNAL-IP   PORT(S)                                      AGE
istio-ingressgateway   LoadBalancer   10.105.2.1    <pending>     15021:30993/TCP,80:30757/TCP,443:32529/TCP   28m
istiod                 ClusterIP      10.110.7.24   <none>        15010/TCP,15012/TCP,443/TCP,15014/TCP        29m
원격에서 붙어서 클러스터의 Master 노드의 IP:30757로 접근해보겠습니다!
http://[MASTER_NODE]:30757/
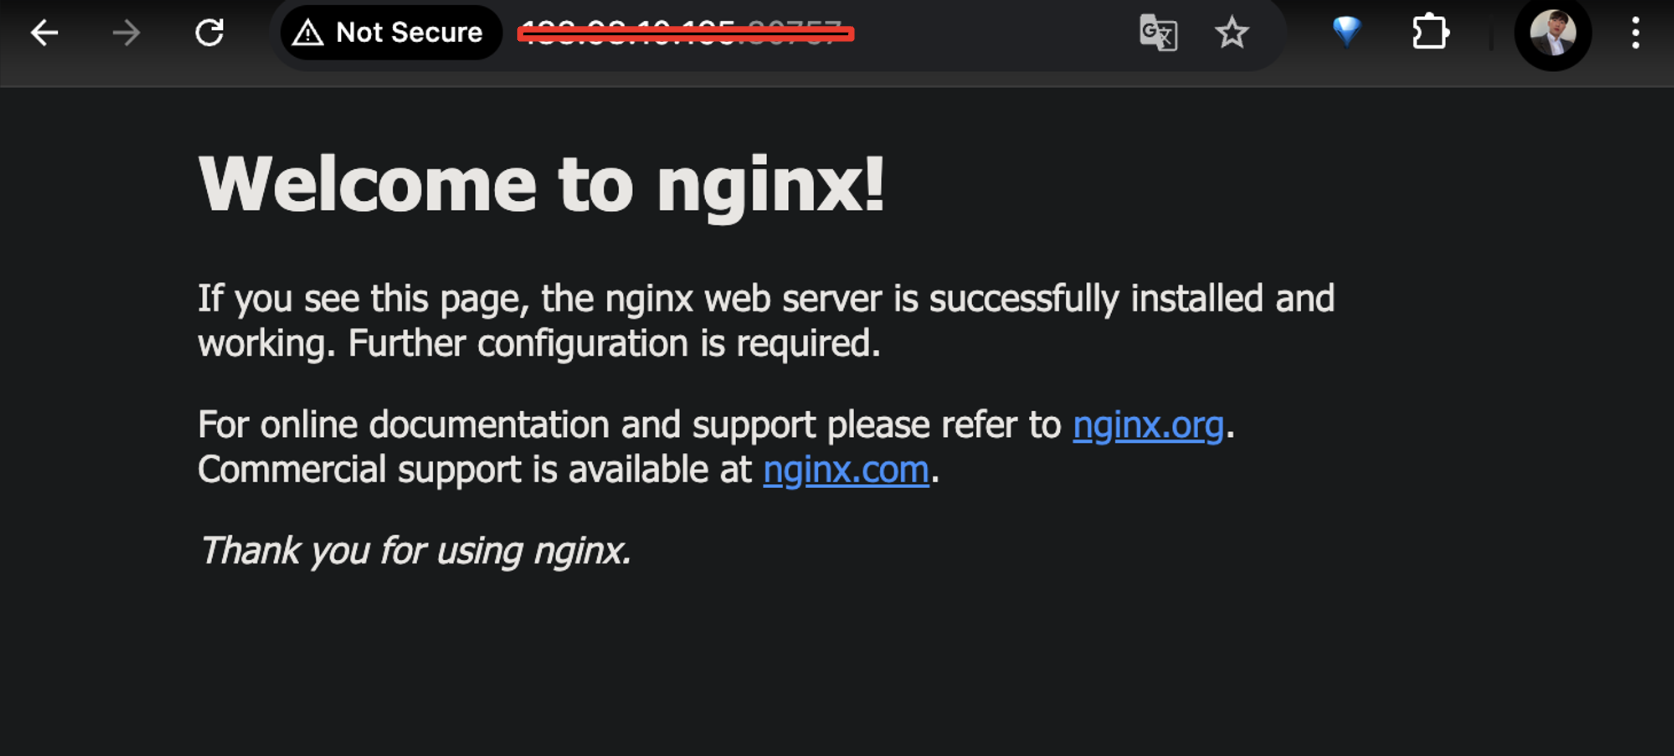
이상으로 Istio 를 활용하여 Virtual Service 내용을 확인하였습니다.
다음에는 도메인을 할당받아 Cert Manager를 설치해보고, https gateway와 virtualservice에 sub domain을 적용해보겠습니다.
감사합니다!